
Yay! I am so happy to be able to finally share with you our DIY boy’s bedroom update! We started this update in June and finished this month, in September. We spent hours upon hours dreaming up, organizing and de-junking, building/sanding, and moving forward in our decisions with how to best make this space functional, intentional, and a place my kids want to be!

This is my son and his buddy, loving our boys’ new digs. We have three boys. Over a year ago we moved one of them into his own room, but most nights he ended up on the floor of this room (or roaming the house as he struggled to stay in his bed, alone in his room). Another son spent his nights sleeping on a mattress on the floor in here as his bed had broken some time ago.
Do you find yourself getting comfortable in routines that don’t work or cause greater stress? I recently realized our sleeping situation 1) wasn’t working and 2) had been going on for far too long. This set me on a quest to fix all things about my sons’ living situation that wasn’t working. I had to be honest, and be willing to make big changes all with the goal to make their day to day lives better.

My husband built this toddler bed in the boys’ room over seven years ago. All four of our kids have used it. It is as sturdy as they come. He used poplar wood to build the bed, but to save on costs, and knowing how hard our kids can be on the furniture we used pine for he remainder of the builds. We decided on bunk beds for our older two boys to maximize open floor space. We started the room update by building the bunkbeds, following Jay’s Custom Creations plans for twin bunk beds. My husband bought all his building supplies from Lowes. After he built the frame, but before we put it together, I used 80, 150, and finished with 220 grit sandpaper to smooth the wood. We used Minwax stain in both Ebony and Natural. We finished the bed with two coats of Minwax Paste Finishing Wax in Natural. Both my husband and I can lay on the top bunk without any worries of the bed falling apart. As the pricetag of a bed this sturdy is usually very high, I was happily willing to put in the seemingly endless hours of sanding required to make a bed I know will last.

After we finished the boys beds, I moved on to the next item on the top of the list of things that needed attention in this space - clothing storage. My oldest son was still storing his clothes in his old room, and my younger boys were using a baby changing table to organize theirs. I knew I wanted a big dresser, something that would visually go with the rest of the furniture in this room, something affordable, and a piece that would make three boys getting ready in the morning a breeze. I found the Trava 6-drawer chest in Pine from Ikea USA, and used the same method as the bunk beds to finish the piece. I had my husband cut the legs at an angle for a more high end look, and bought these drawer pulls from Amazon to replace the ones that came with the dresser.

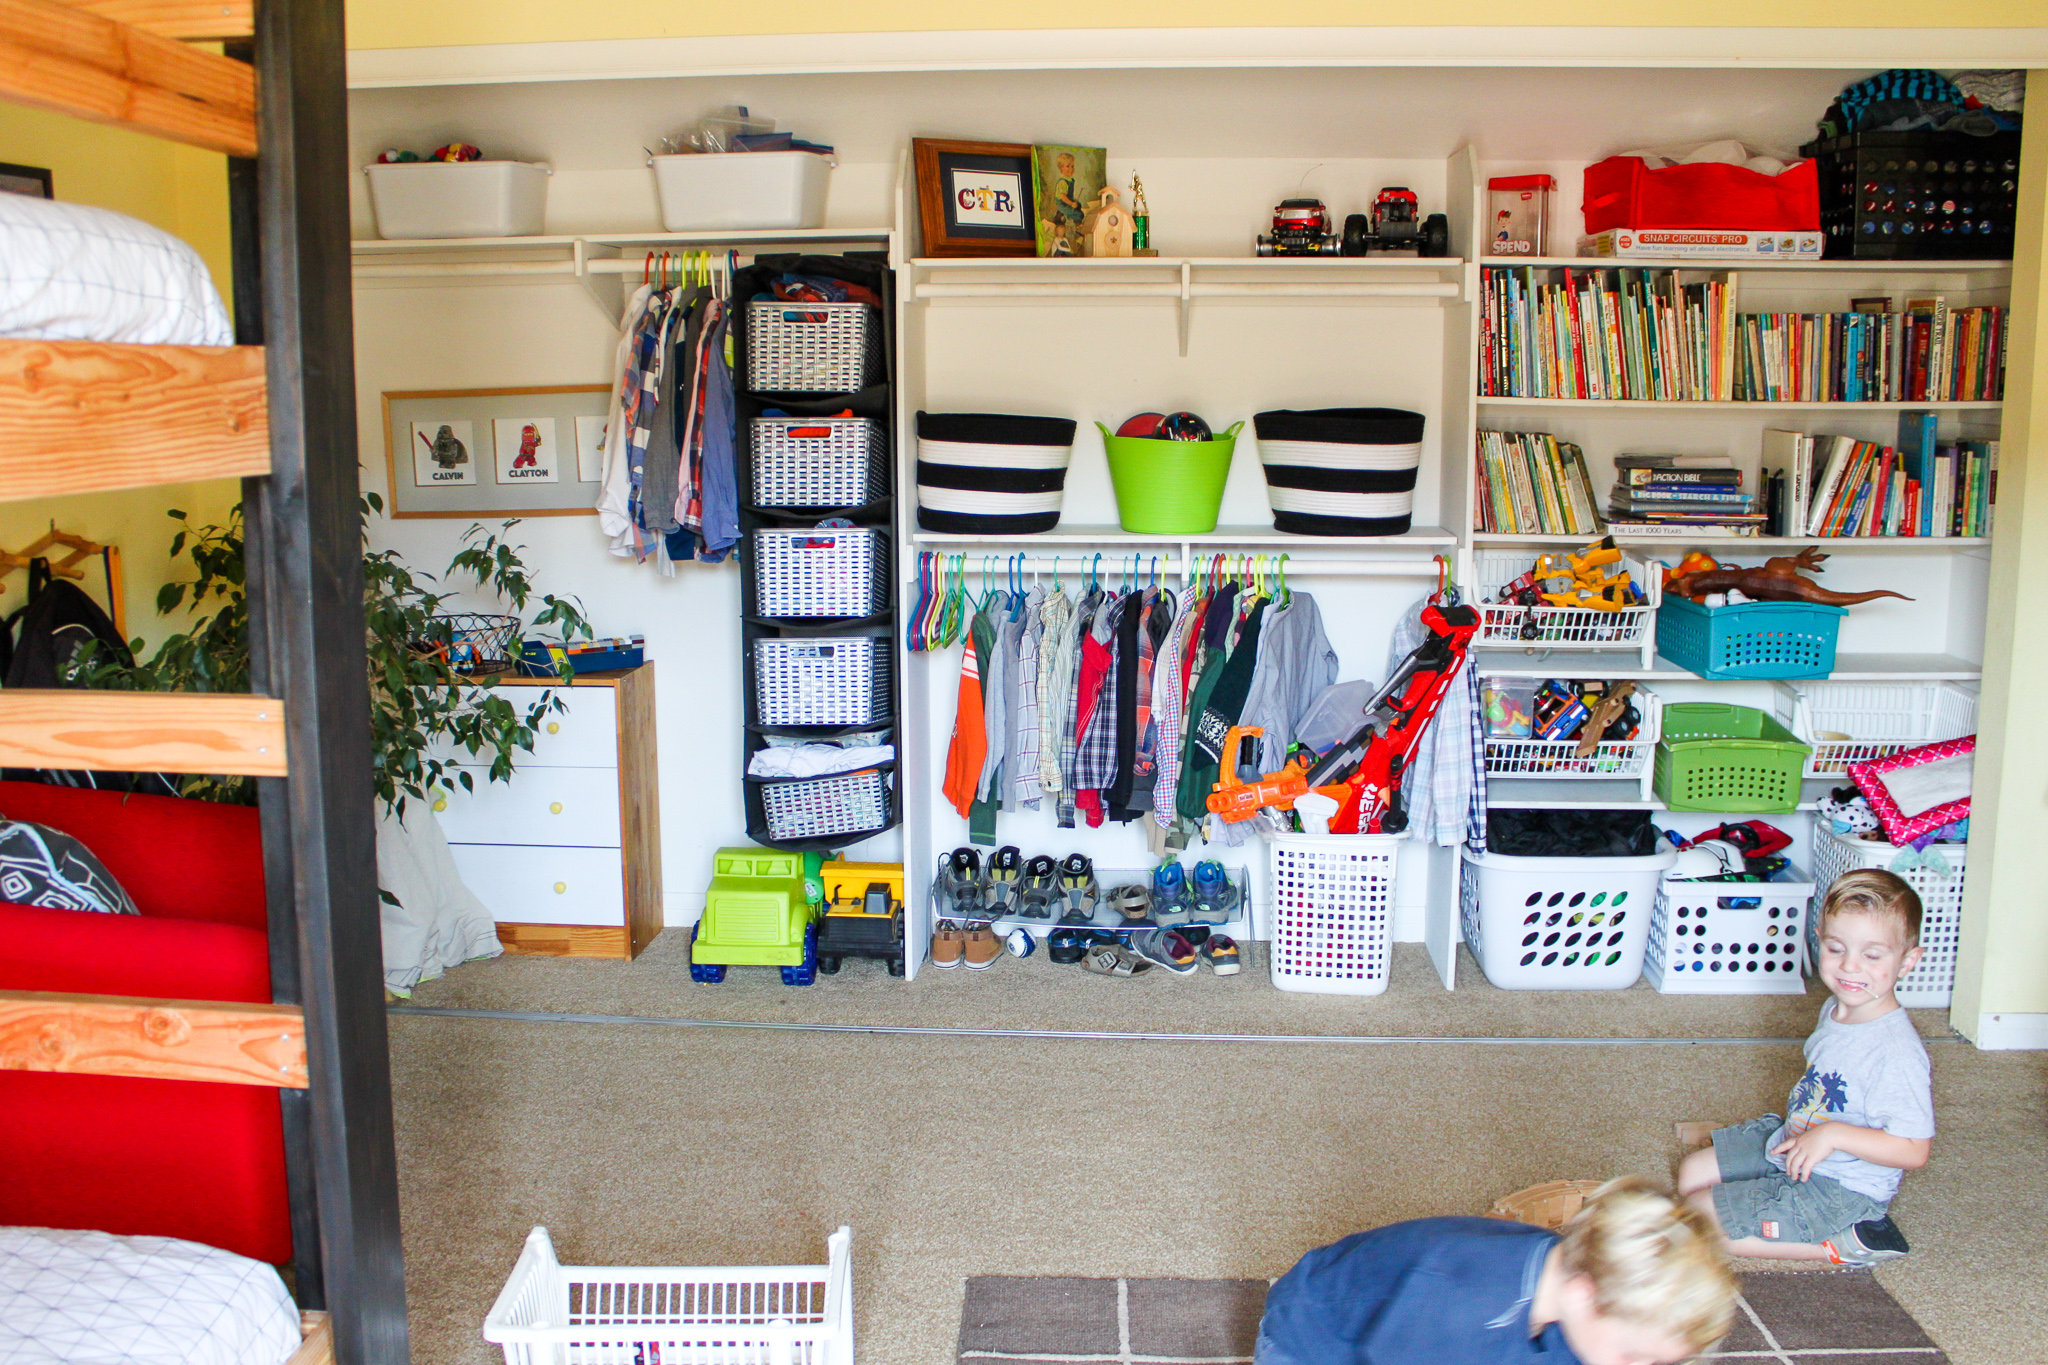
Each boy has two drawers. The drawers are divided by a plastic bin the middle of the drawer either holding socks or undies. On either side of the bin are shorts/pants or shortsleeved shirts/long sleeve shirts. Pajamas, swimsuits, shoes and ties are all stored in the closet area.

Once their dresser was in, I moved on to hat organization. The boys had a rack for their hats, but 99% of the time they would end up on the floor. I bought these hooks from amazon and orgaznied their hats above my youngest bed for easy access. I had this 36” x 36” canvas, purchased from JoAnns during a super sale, and pulled it out to make custom art for above their dresser. I researched online and sketched out a few ideas before settling on the basic shapes of this painting. While I didn’t plan out every aspect of how the painting would go, I’m really happy that I put some forethought into it, and really happy with the results. My husband built me this custom frame, and I sanded, stained and waxed using the above mentioned.

Unfortunately, my boys closet doesn’t have any doors. As such visual organization of their closet is a bigger deal than other closets in our house. Redoing this room on a budget, I was less concerned about buying new, all matching storage bins than everything having a permeant place. The kids and I spent hours pulling out all books, toys, electronics, arts and crafts. Their closet holds all the toys they own. We sorted, threw away, dejunked and either found a home for it or got rid of it. I still plan to label all the bins to make cleaning even easier. One additional thing I did do was put an empty green bin on the right side of their closet. This bin is for when we are cleaning fast, or friends are over and helping us to clean up the kids room after playing. Anything can quickly be thrown in this bin for a quick cleanup, and sorted later during the day or week when we have time.
There were a few last things I did for this space to make it functional, intentional and easy for the boys to live in. First, I took a free poster we grab in a visitors center driving back through Utah of Lake Powell. We visited Lake Powell during a family reunion two years ago and the boys can’t stop talking about it. I cut the poster in two, framed the two halves and hung them together on the wall.

It is important to us that our children be good readers. Some love reading while others find it a chore, lose their books or their place in the books - making it impossible to read one from start to finish. To make it easier and more fun for them, my husband used scrap wood from previous projects and built three of these small, forward facing bookshelves. I then sanded, stained and waxed in the usual way. We put lights from Ikea next to each bed, making nighttime reading easy and special.


I put a rack behind the reading chair (which I will recover in a more neutral tone at a future date) to hold sports backpacks. I also hope to sew some different covers for their throw pillows. I put command hooks on the back of their bedroom door for robes. Bins go under their bed for school books and nighttime diapers.
I am truly happy with how this room has turned out. The boys have a much easier time keeping it clean, getting dressed, going to bed and finding what they are looking for. It is a space I enjoy being in to read them books, ask about their day, or all lay down on the floor together at night to listen to podcasts or music.
I am so happy we took the time to make this a truly enjoyable, well thought out, easy to live in space. And if routines or methods of doing things just aren’t working in the future, I know again I can make a change… quickly. No sense living in a space that isn’t functional. Now to move on to the next room in the house!
